
Table of Contents
Getting your artwork ready for print can be quite difficult, so to make it easier for you, we put together a step-by-step guide on how you can set-up your artwork file using Adobe Illustrator.
How to Set-Up Your Artwork Files
Verification
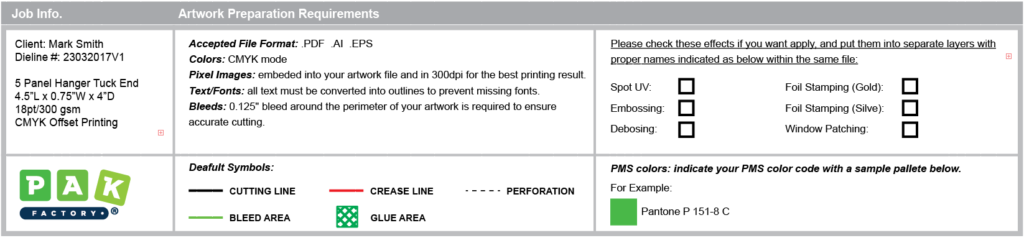
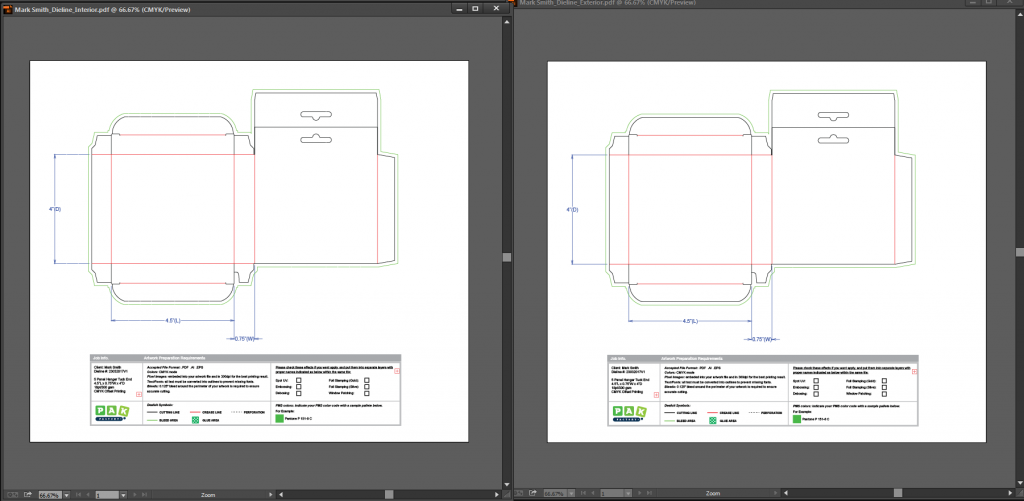
Open the dieline that PakFactory has provided in Adobe Illustrator and verify the job information at the bottom to indicate your desired effects and Pantone colors accurately.
Please also familiarize yourself with the different lines on the dieline to mitigate any issues when placing your artwork.
Layer Set-Up
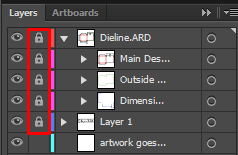
Open your ‘Layers’ window by going to Window > Layers.
Check to make sure that all layers except for ‘Artwork’ are locked to prevent the dieline and information panel from being altered.
CMYK Color Mode
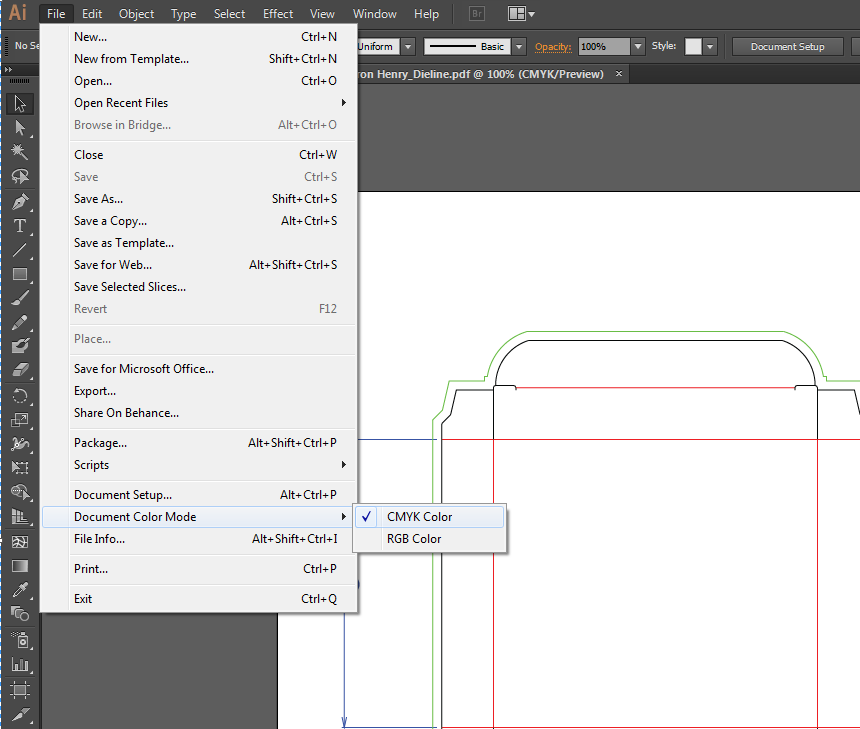
It’s essential to ensure that your workspace is converted into CMYK color space, as it is mandatory for printing.
RGB will ultimately cause color disruption and is not used for print as printers use CMYK ink.
To ensure that you are working under CMYK color space, click on File > Document Color Mode > CMYK color, and the tab of your artwork file should indicate (CMYK/Preview).
Placing Artwork
Before you begin working on your artwork, it is MANDATORY that you follow our General Artwork Guideline or Artwork Guide Digital Corrugated for digital corrugated boxes.
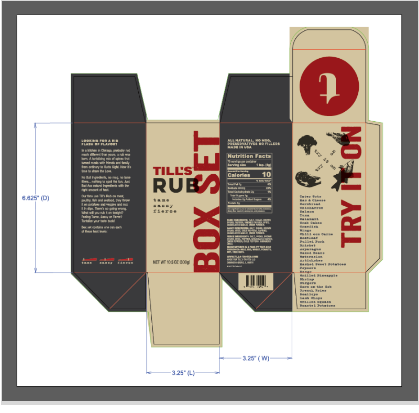
Artwork can be created directly on the dieline or transferred from another file.
Make sure to include bleeds if you do not want white borders on the edges of your boxes.
If you want to include a white border, make sure your artwork does not surpass the cutting line.
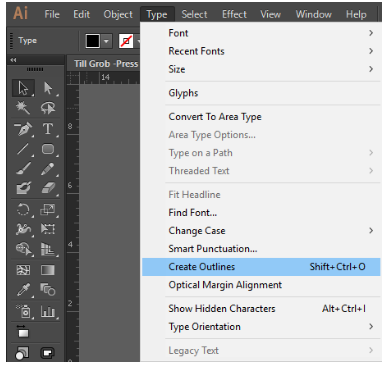
All texts must be outlined.
Outlining text ensures that your typefaces will be included in the document, mitigating issues with missing fonts.
To outline texts, simply select all text elements and go to Type > Create Outlines.
*Important Note*: DO NOT flatten layers. Keep all artwork links visible and unbedded.
Send Files To PakFactory
Final artwork files sent to PakFactory for production must be in ai, pdf, or eps file format with all images embedded.
We do not accept any other format, as this is the industry standard for printing.
Send the artwork file along with required font files (if fonts are not outlined) to your product specialist you were working with.
Approval
Our designers will verify the artwork and will let you know if there are any additional requirements.
Otherwise, once the artwork is approved, your packaging is ready for production.
How to Get Two-Sided Printing
You will need two separate dielines (PakFactory will provide the two dielines) using one for your outside artwork and the other for the inside artwork.
Follow the abovesteps on how to set-up your artwork files for both your artwork files.
When sending both files to PakFactory, make sure to indicate which dieline is for outside and inside printing along with the font files
(example: filename_exterior.eps & filenane_interior.eps or filename_exterior.pdf & filename_interior.pdf)
How to Add Pantone Colors
Selecting Pantone Color Swatch
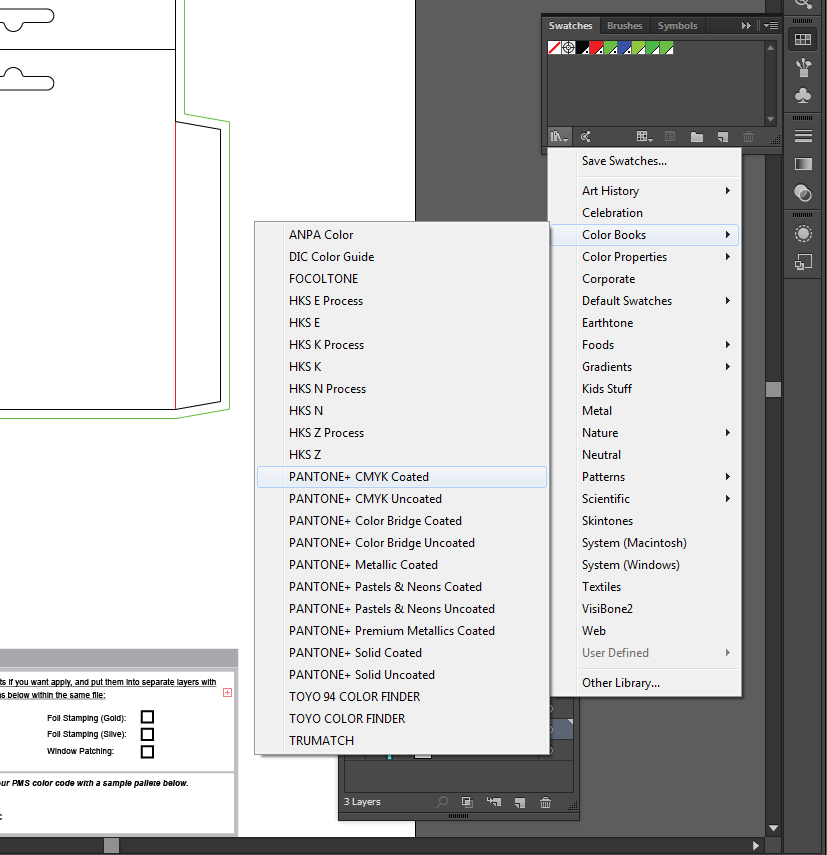
The Pantone Color Swatch PakFactory uses is Pantone + CMYK Coated.
To access these colors, go to Swatches > Bottom Left Icon > Color Books > Pantone + CMYK Coated.
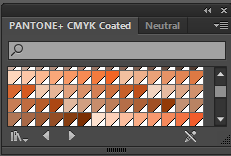
Choose Your Colors
Now you are free to choose your Pantone Colors for your artwork.
Avoid clicking on the left and right arrows to prevent switching to another color book.
You can choose up to 4 Pantone Colors for your artwork.
Indicate Pantone Color
You must add your Pantone Colors at the bottom of the artwork file, indicating both the color and the color code to avoid delays.
Our designers need this information for verification!
And there you have it!
Follow these steps carefully, and you will have an easier time getting through the rest of the packaging process.
If you have any questions, you are always welcome to contact us.


